In this tutorial, I will walk you through the steps involved in deploying an end-to-end application in Azure Container Services that utilize Azure Container Instances, Azure Container Registry, and Azure Cosmos DB.
Azure Container Instances (ACI) are serverless containers that can be provisioned directly without host VMs. They are lightweight, ultra-fast instances that are priced on a per-second execution model. ACIs are designed for executing code that’s typically invoked in response to an external event. These instances are short-lived which exit after their job is done.
Though this tutorial doesn’t highlight the typical use case of ACIs, it demonstrates the lifecycle of such as an application. As we deploy the application, we will explore how to use Azure Container Registry to store images, and move the state to Azure Cosmos DB.
The application that we deploy is a simple stack app that needs a MongoDB backend. Since Cosmos DB is compatible with MongoDB, we will simply point the application to an instance of Azure Cosmos DB with no changes to the original code.
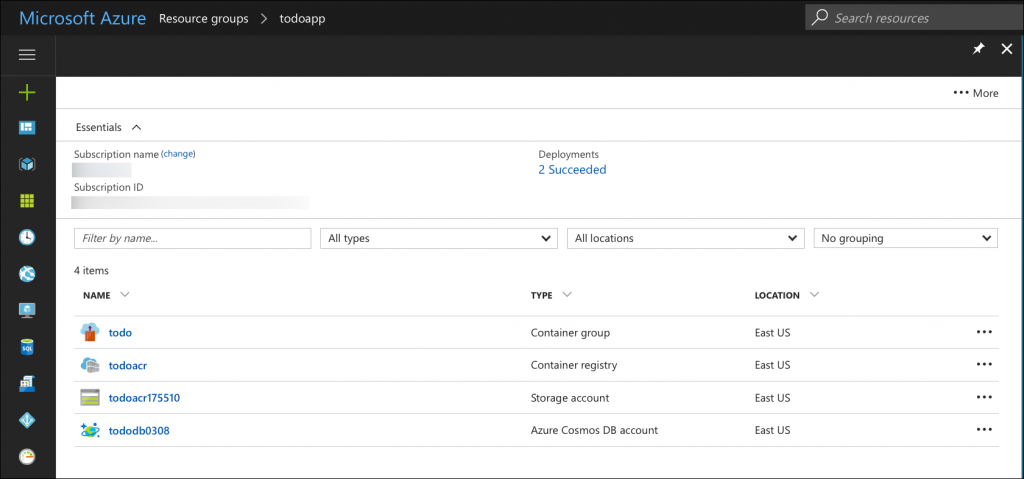
By the end of this deployment, we will have an Azure Resource Group that will have the resources shown below:
Preparing the Environment
Let’s start by pulling the right images from Docker Hub and testing the application on our development machine. You need Docker for Mac or Docker for Windows to test the application.
Run the following commands to check out the application.
|
1
2
3
|
$ docker run –d —name db mongo
$ docker run –d –p 80:3000 —link db:db —name todo janakiramm/todo
|
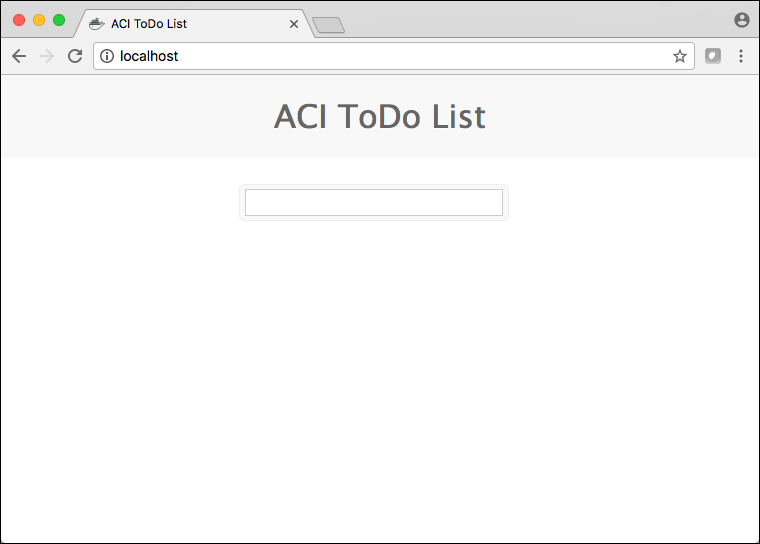
Accessing the application shows a simple user interface in the browser:
We will now initialize a few environment variables that will come handy during the deployment process.
|
1
2
3
4
5
6
7
|
$ export LOC=eastus
$ export RG=todoapp
$ export DB=tododb$RANDOM
$ export REG=todoacr
|
Let’s start by creating an Azure Resource Group to hold all the related resources for this application:
|
1
|
$ az group create —name $RG —location $LOC
|
Push the Image to Azure Container Registry
The next step is to move the image to Azure Container Registry (ACR).
ACR reduces network latency and eliminates ingress/egress charges by keeping the Docker registry in the same data centre as your deployments. It gives you local, network-close storage of the container images within the subscriptions and full control over access and image names.
|
1
|
$ az acr create –g $RG —location $LOC —sku Basic –n $REG
|
Verify the availability of ACR with the below command. You should find todoacr in the list.
|
1
|
$ az acr list —query [*].name
|
Let’s create an Azure Service Principal for authenticating against the container registry. This service will enable identity and access management to applications that need role based access to Azure resources.
When you have a cloud-based application or script that needs to access resources, you can set up an identity for the app and authenticate the app with its own credentials.
We will use Azure CLI to create the Service Principal for ACR.
|
1
2
3
4
5
6
7
8
9
|
$ az ad sp create–for–rbac —scopes /subscriptions/<SUBSCRIPTION_ID>/resourceGroups/todoapp/providers/Microsoft.ContainerRegistry/registries/todoacr —role Owner —password Password@123
$ az acr update –n todoacr —admin–enabled true
$ az acr credential show –n todoacr
$ export USR=<appID> # Replace with actual value
$ export PASSWD=<password> # Replace with actual value
|
Ensure that you replace the placeholders with actual values of your Azure subscription ID, the Service Principal application ID, and Service Principal password.
With the registry in place, let’s move the image into it.
|
1
2
3
4
5
6
7
|
$ docker pull janakiramm/todo:latest
$ docker tag janakiramm/todo:latest todoacr.azurecr.io/todo:latest
$ docker login –u $USR –p $PASSWD todoacr.azurecr.io
$ docker push todoacr.azurecr.io/todo:latest
|
At the end of this step, you would have created an Azure Container Registry along with a Service Principal. The image from Docker Hub is also moved into the registry.
Create Azure Cosmos DB Instance
Cosmos DB is a globally-distributed, web-scale, managed database on Azure. It is a multi-model database service with support for key-value, columnar, document, and graph models. The service exposes APIs in popular formats including DocumentDB, Azure Table, MongoDB, and the Gremlin API.
Let’s create an Azure Cosmos DB in the same resource group that holds the other assets of the application. We will use this database to store the state of the ACI container.
|
1
2
3
4
5
|
$ az cosmosdb create —name $DB —kind MongoDB –g $RG
$ az cosmosdb list–connection–strings –g $RG —name $DB
$ export CONNSTR=<Connection_String> # Replace with actual value
|
Verify the creation with the below command
|
1
|
$ az cosmosdb list
|
Launch the Azure Container Instance
We now have the image available in ACR along with the Cosmos DB instance. The next step is to create the instance based on the image.
|
1
2
3
4
5
6
7
8
9
10
11
12
13
14
15
16
17
18
19
|
$ az container create
—name todo
—resource–group todoapp
—registry–login–server todoacr.azurecr.io
—registry–username $USR
—registry–password $PASSWD
—image todoacr.azurecr.io/todo
—environment–variables DB=“$CONNSTR” PORT=80
—ip–address public
—port=80
|
The above command pulls the image from ACR by using the Service Principal credentials that we created earlier. It passes the Cosmos DB connection string as an environment variable to the Node.js application. It forces the application to listen on port 80. Finally, it assigns a public IP address accessible on port 80.
Note : If you encounter an error in this step, switch to the creation of ACI through an Azure Resource Management (ARM) template. The current version of Azure CLI has a bug that doesn’t accept environment variables with special characters. The ARM template is available as a Gist on Github. Don’t forget to replace the variables with actual values obtained from the previous steps.
|
1
|
$ az group deployment create —name todo —resource–group $RG —template–file azuredeploy.json
|
After the ACI instance is launched, access the application through the public IP address of the instance:
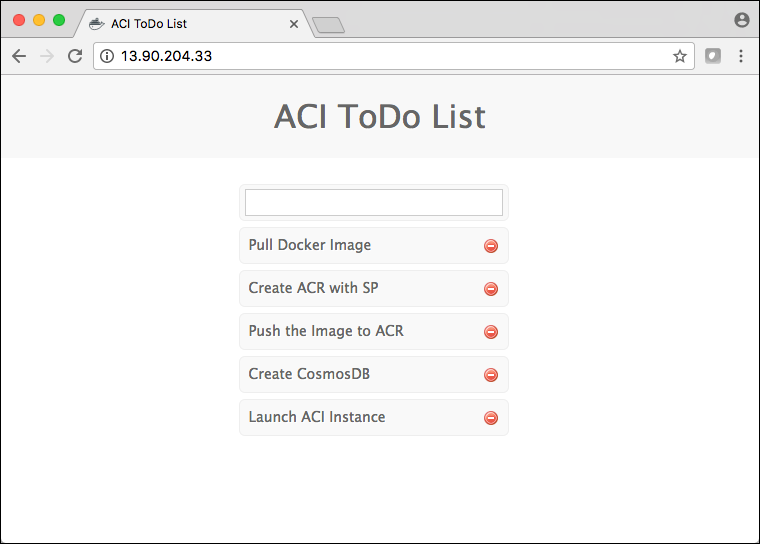
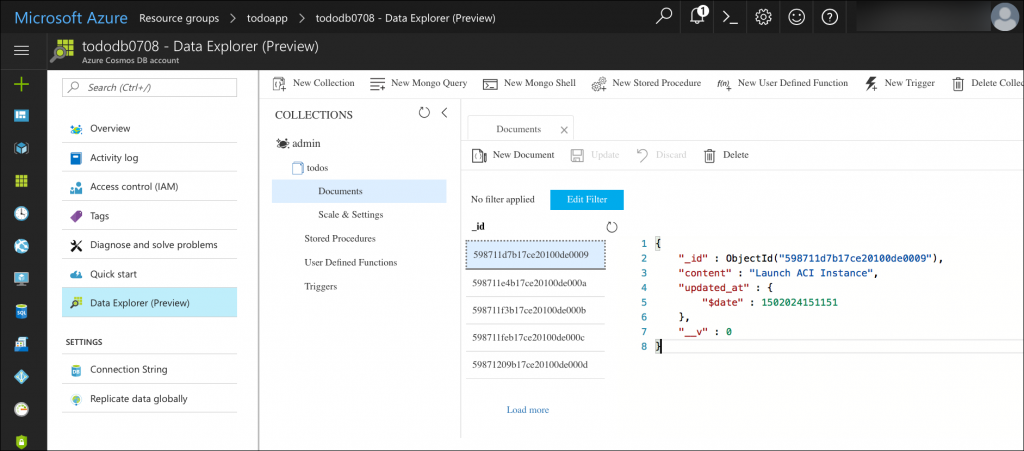
After entering a few todos in the web UI, check out the creation in Azure CosmosDB. You can use the Data Explorer in the CosmosDB blade in Azure Portal. It should show the collection and the documents created by the application:
Finally, check out the details of the ACI and the logs with the following commands.
|
1
2
3
|
$ az container list
$ az container logs —name todo —container–name todo –g $RG
|
All the commands used in this tutorial are available as a Github Gist.
Conclusion
The objective of this tutorial is to demonstrate the usage of ACR, ACI, and Azure Cosmos DB. While you may need Azure Container Service (ACS) for orchestrating and managing multi-container workloads in production, ACI offers a simple mechanism to run stateless applications based on a single container. By taking advantage of Azure Storage and Azure CosmosDB, we can isolate the state into a durable and persistent service, which can be shared among multiple containers running within ACI and ACS.
In the next part of this series, we will extend this use case to a multi-container deployment scenario utilizing the ACI Connector for Kubernetes. Stay tuned!
InApps is a wholly owned subsidiary of Insight Partners, an investor in the following companies mentioned in this article: Docker.
Feature image via Pixabay.


